> ## Documentation Index
> Fetch the complete documentation index at: https://bunnynet-cb9733c2-add-new-partner-apis.mintlify.site/llms.txt
> Use this file to discover all available pages before exploring further.
# GitHub Integration
> Keep your Edge Script code in a GitHub repository and deploy it with GitHub Actions.
The GitHub integration lets you keep your Edge Script code in a GitHub repository instead of the dashboard editor. You get version control, and you can run the script through GitHub Actions before it ships: builds, tests, minification, security scanning, or anything else your pipeline needs. This suits larger applications, where the script is built from multiple files or prebuilt resources rather than written in a single editor tab.
## What you'll need
* A [bunny.net](https://bunny.net/) account ([log in](https://dash.bunny.net/auth/login?pk_buttonlocation=menu) or sign up for a [free trial](https://dash.bunny.net/auth/register)).
* A GitHub account.
## Creating a new repository
Start here if the project is new and you want to base it on a bunny.net template.
1. Login to the bunny.net dashboard.
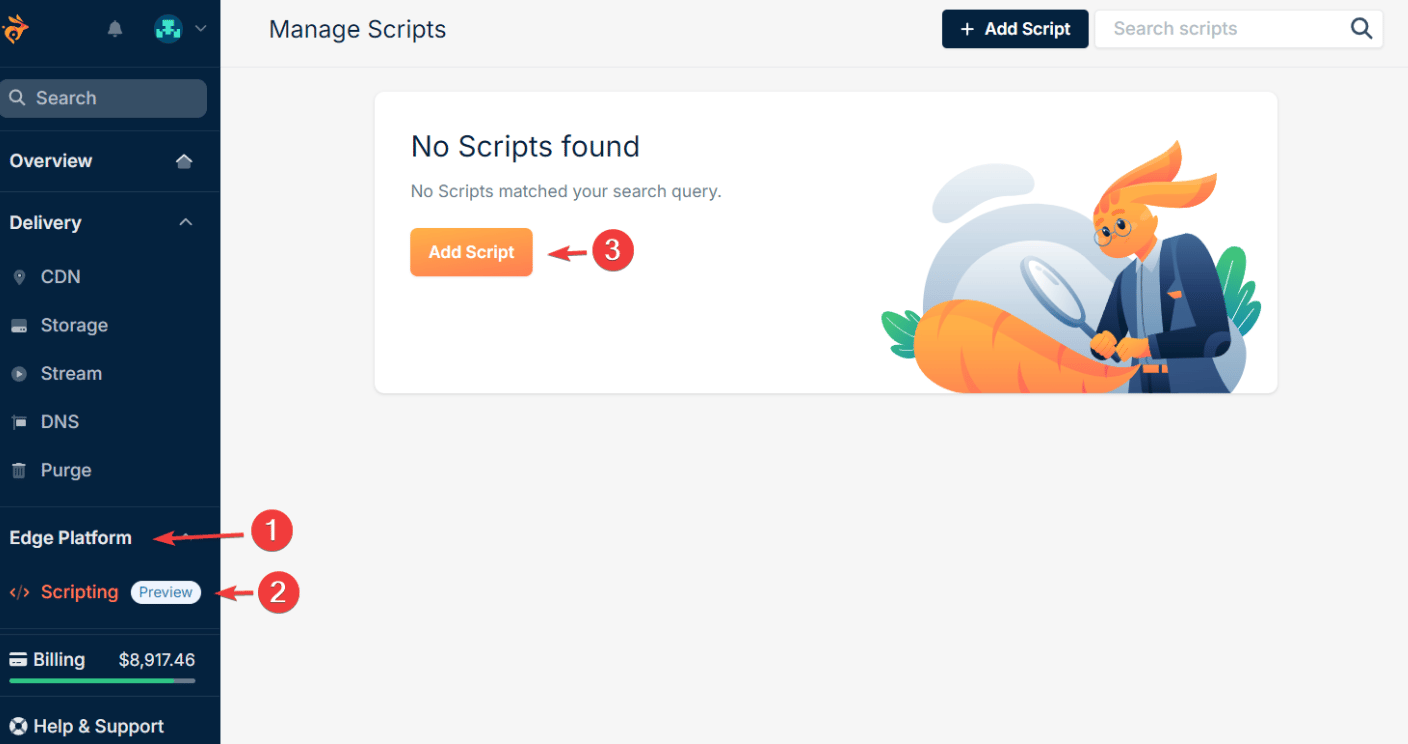
2. Navigate to **Edge Platform** > **Scripting** and click **Add Script**.
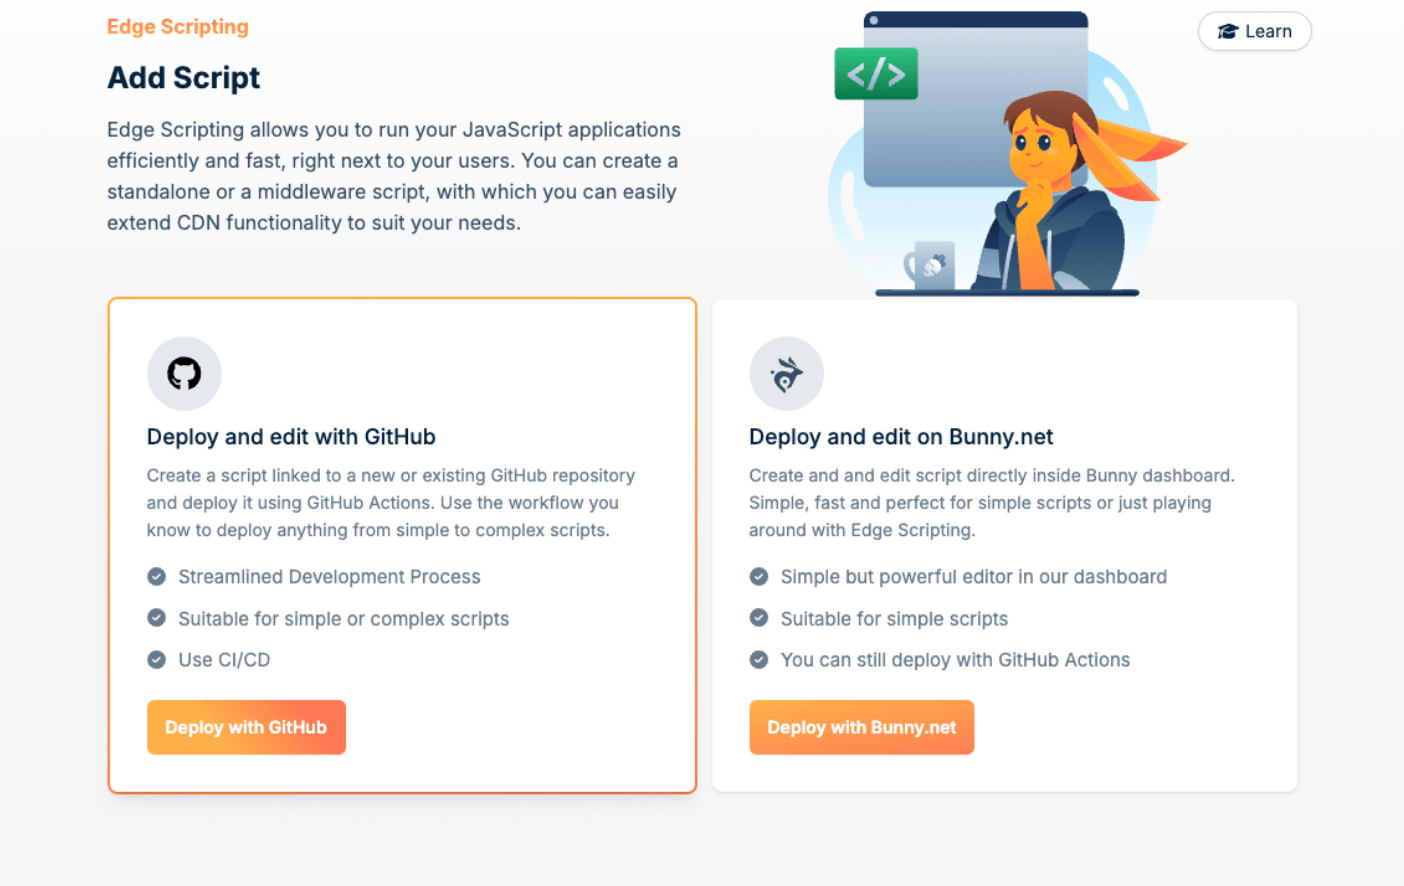
 3. Choose where the code lives. **Deploy and edit on Bunny.net** lets you write code directly in the browser and suits simple scripts. Select **Deploy and edit with GitHub** to keep the code in a GitHub repository.
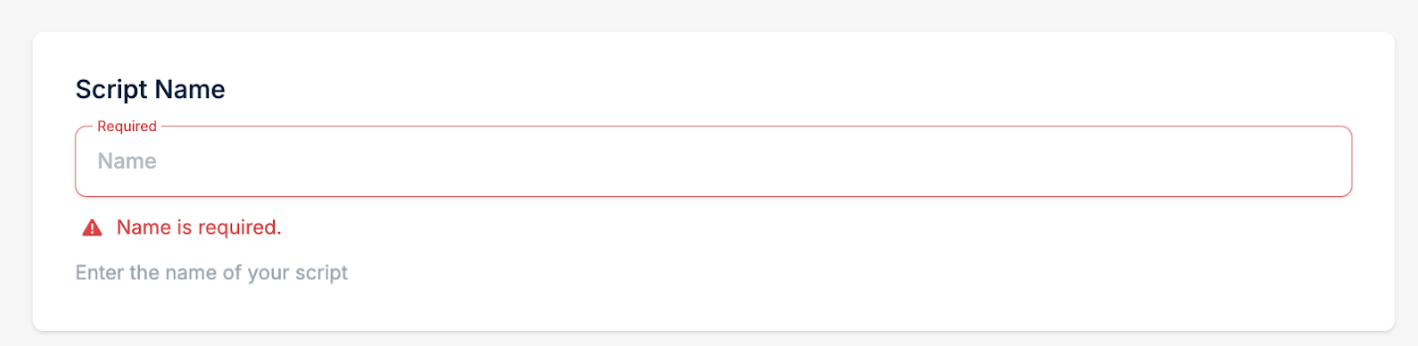
 4. In the second step of script creation, fill in the **Script Name**.
 5. Select between Standalone or Middleware script type. For more information, see our [Script Types documentation](/scripting).
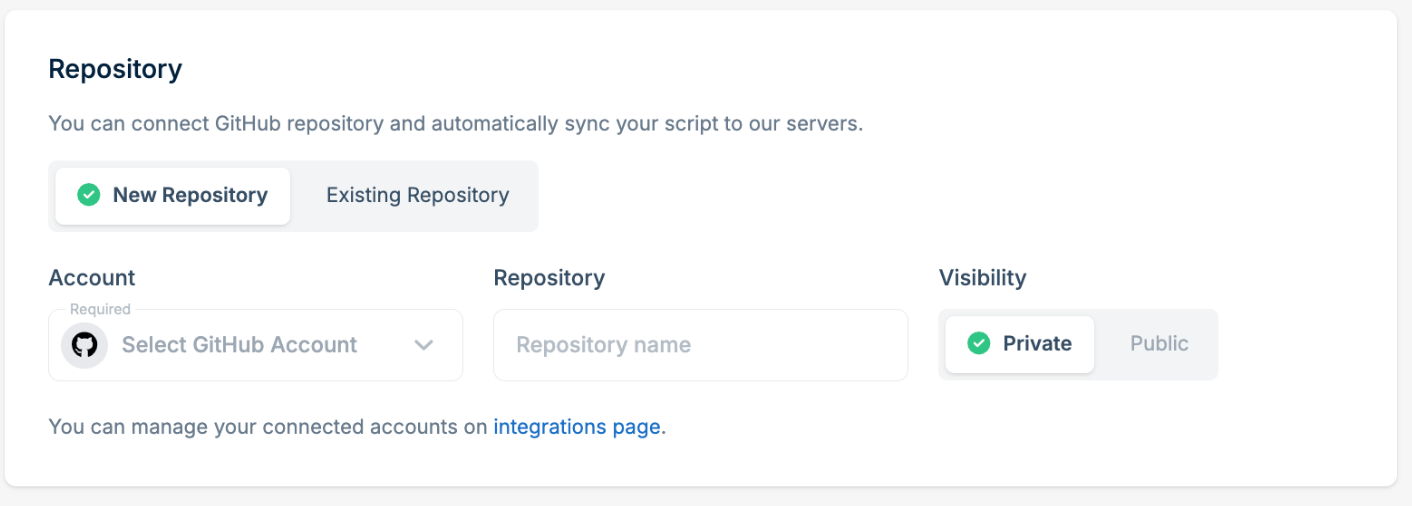
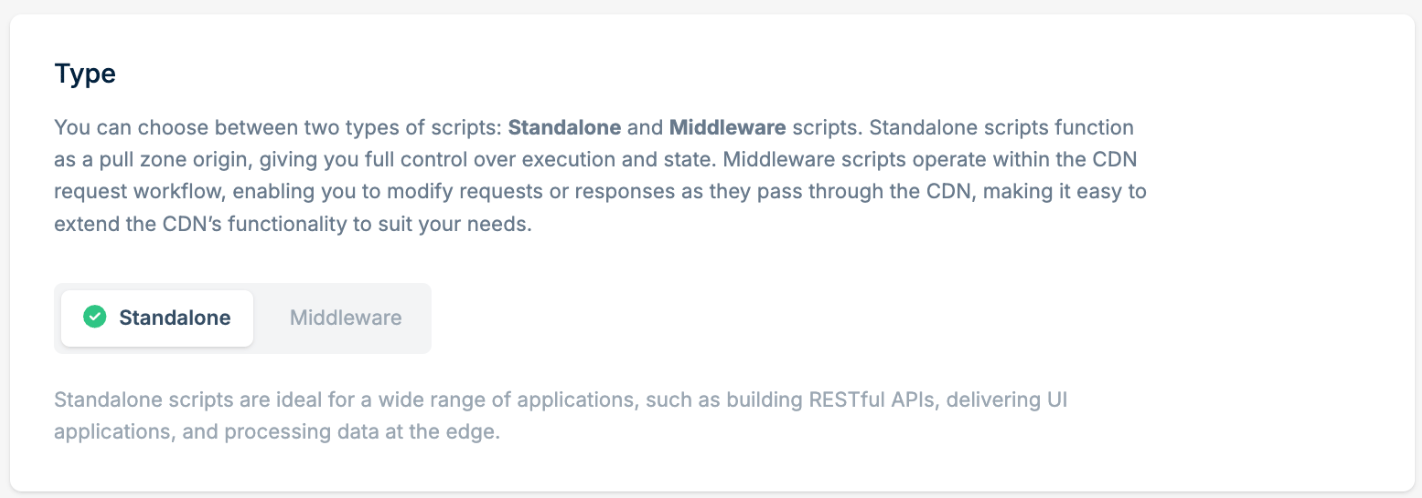 6. Use the Repository section to connect the script with the GitHub repository. If you haven't connected your GitHub account yet, click Connect GitHub Account.
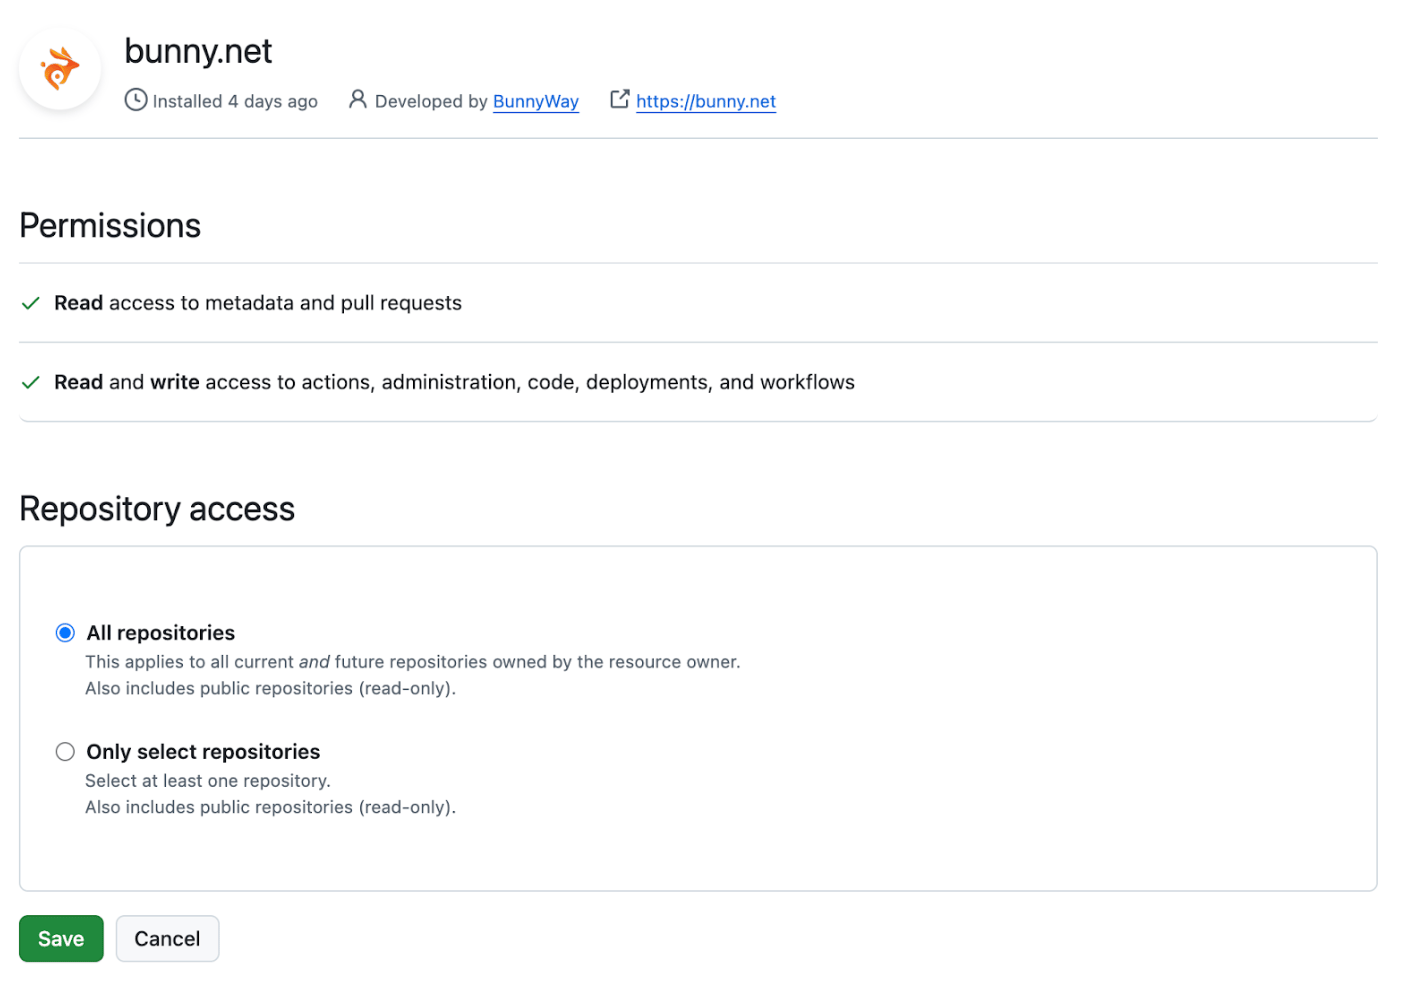
 7. You will be redirected to the GitHub application permission page, where you can select the repositories that bunny.net can access.
 8. Select **New Repository** to create a preconfigured repository based on a template.
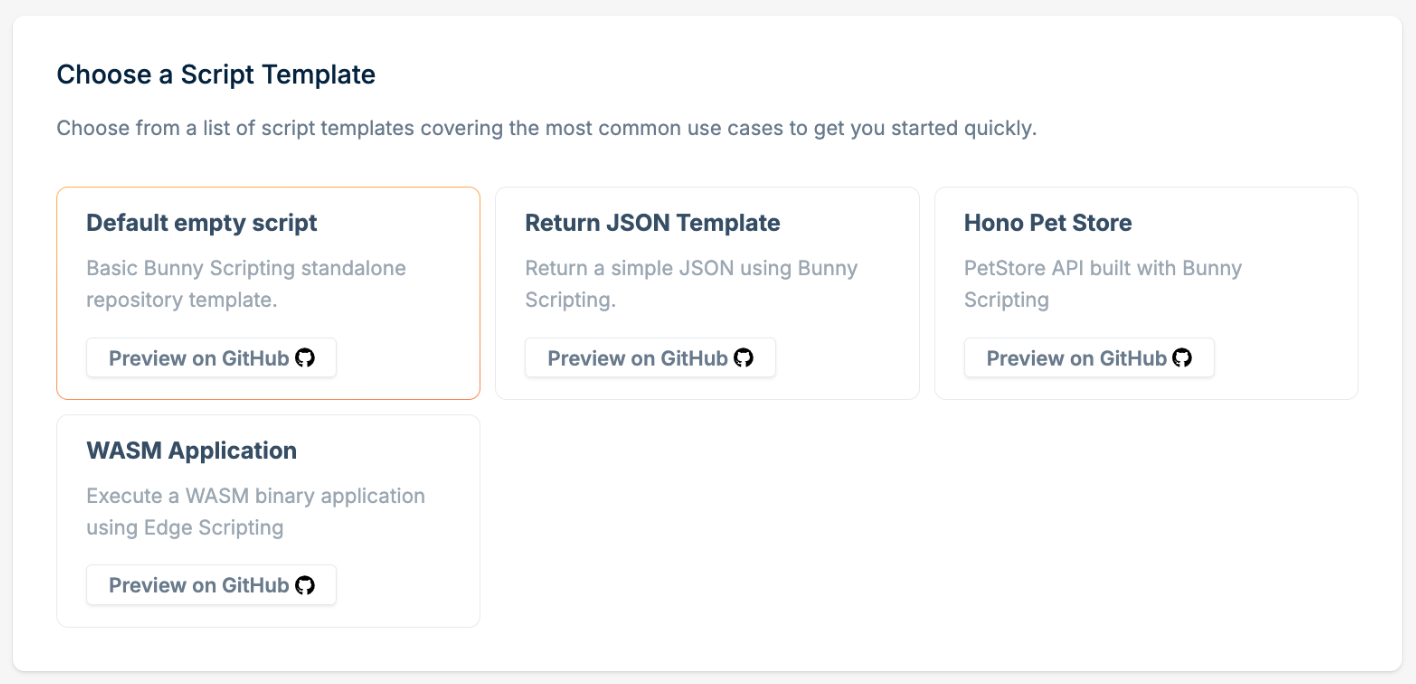
 9. Choose a script template. Each template is a starting setup for a different scenario. For demo purposes, you can choose the **Default empty script**.
 10. Click **Add Script**.
A new GitHub repository is created from the template, along with a workflow pipeline that deploys the build output to bunny.net Scripting. The pipeline runs straight away. This takes a few seconds, and you can watch it in the repository's Actions tab.
10. Click **Add Script**.
A new GitHub repository is created from the template, along with a workflow pipeline that deploys the build output to bunny.net Scripting. The pipeline runs straight away. This takes a few seconds, and you can watch it in the repository's Actions tab.
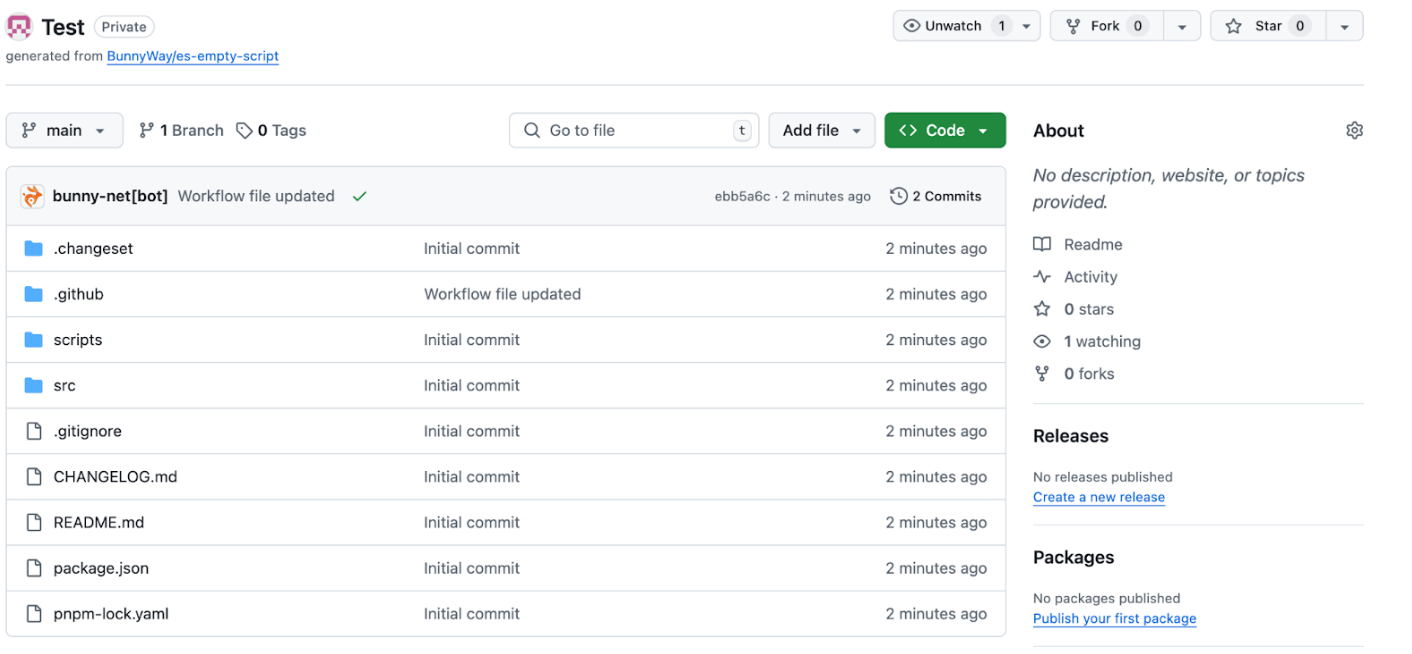 11. Your script is now live and ready to be invoked.
The provided templates are starting points for implementing your own application. Use the documentation available within the GitHub repository to learn how to extend it with your application logic, building custom functionality and features as needed.
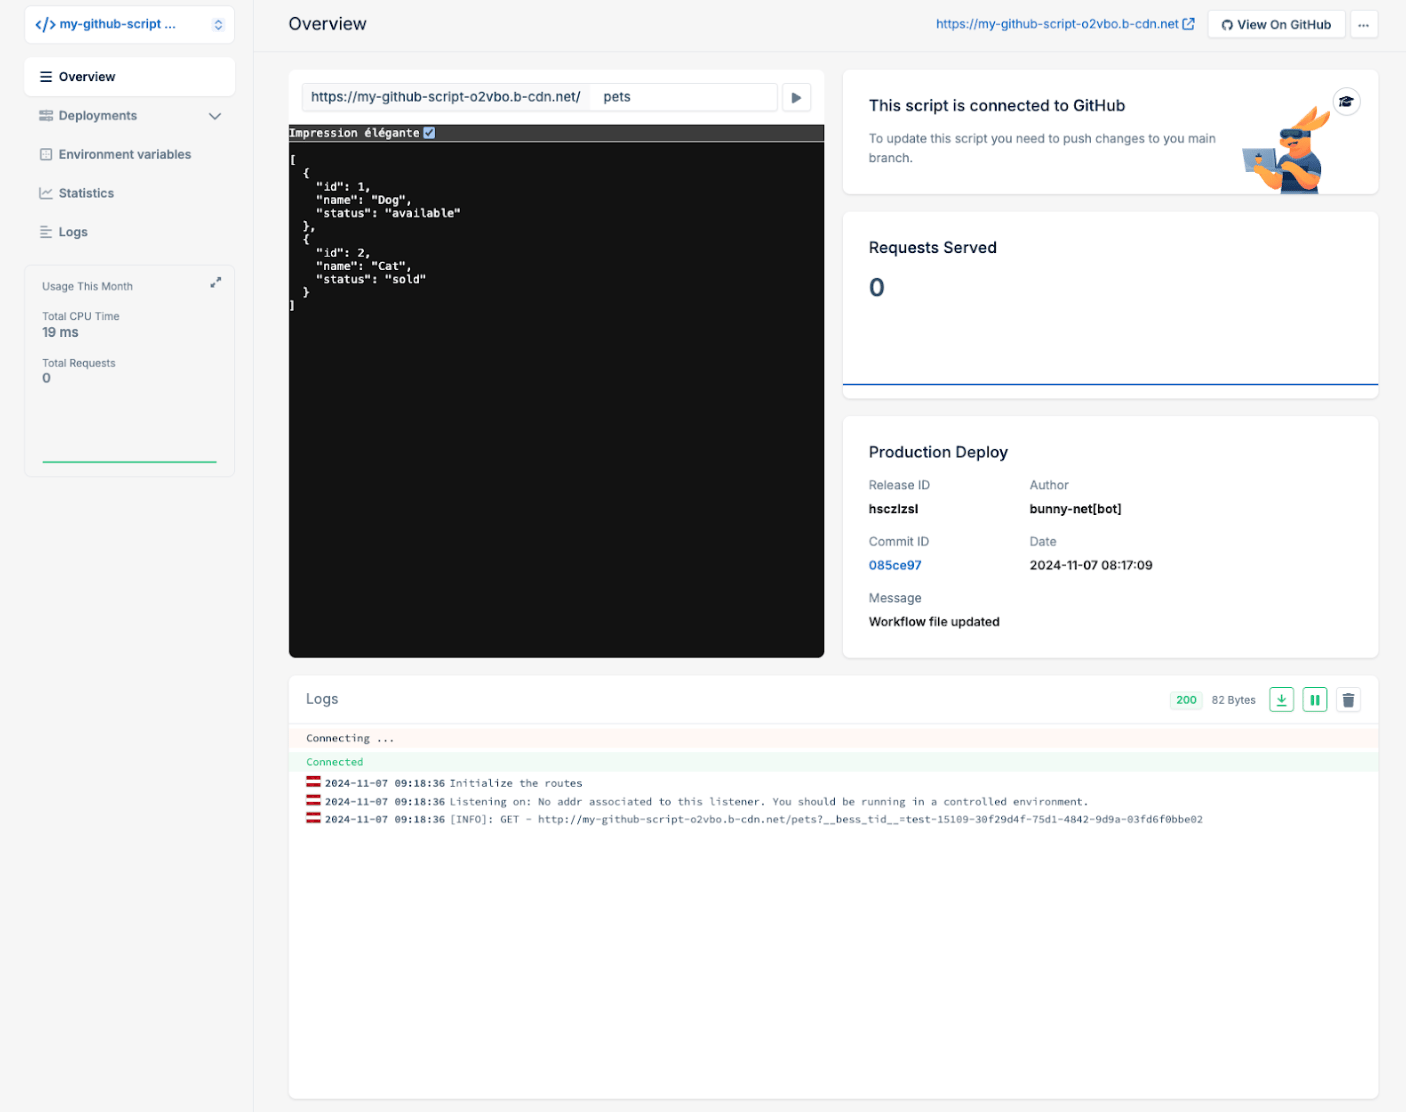
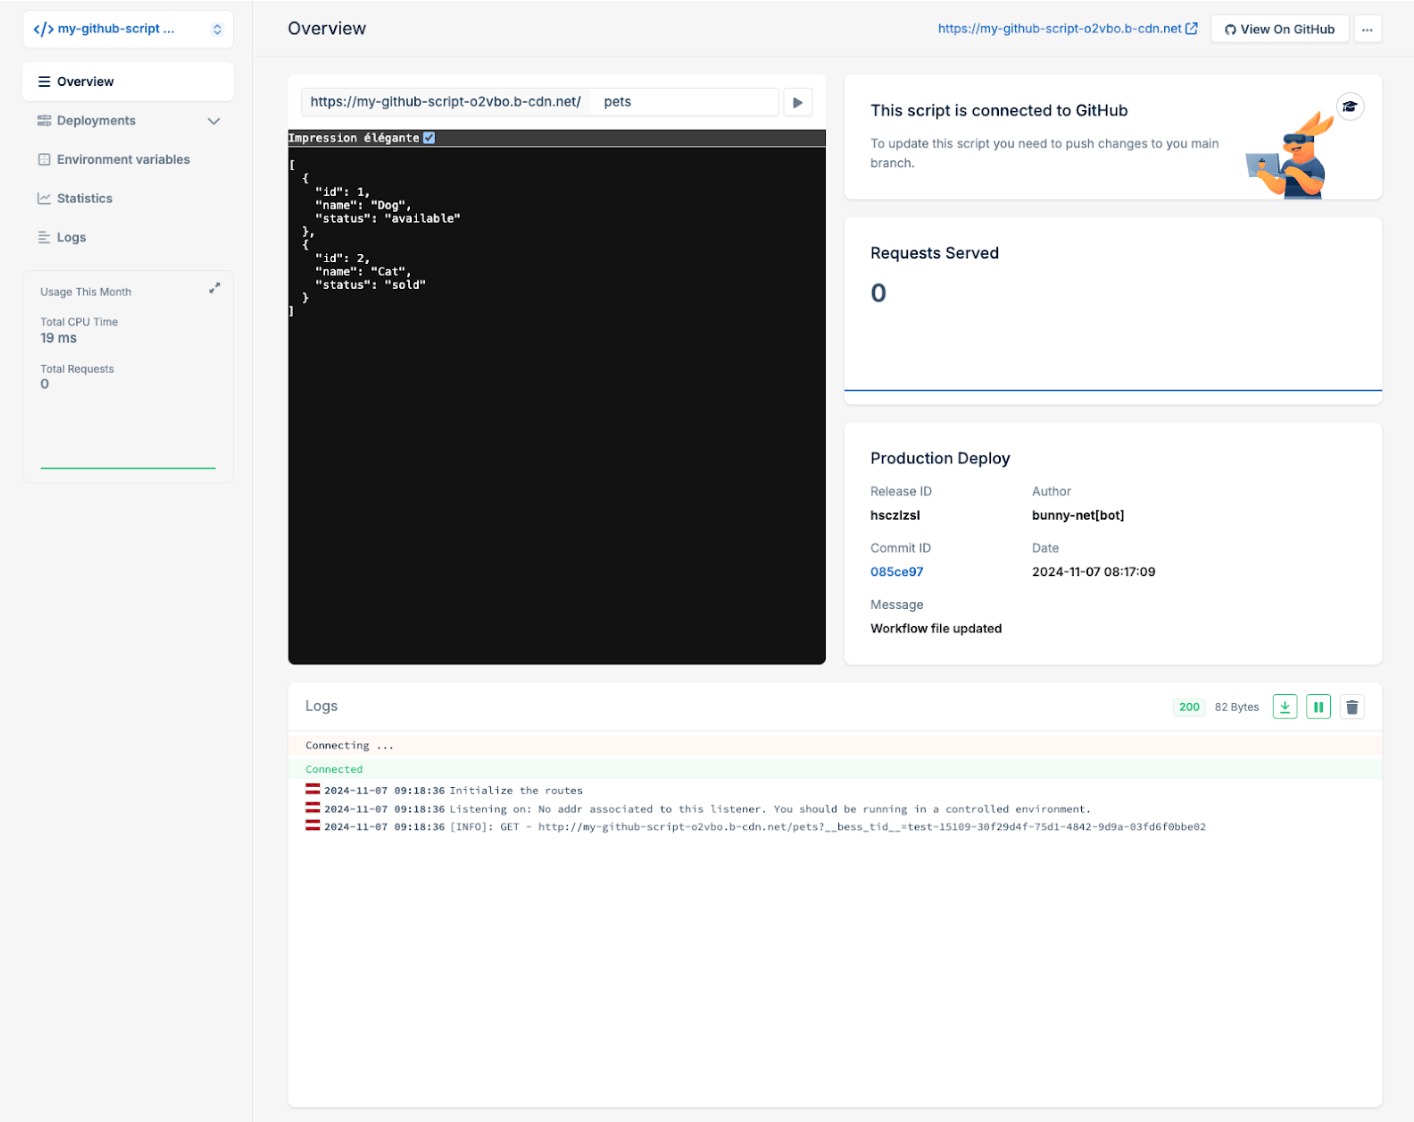
Once the script is live, the bunny.net dashboard shows how it is doing. You can see the number of requests it has served in real time, along with your production deployment: timestamps, version history, and deployment status. Execution logs are there too, which is where you go when something is failing or slower than you expected. Settings, script updates, and redeployment all happen from the same place.
11. Your script is now live and ready to be invoked.
The provided templates are starting points for implementing your own application. Use the documentation available within the GitHub repository to learn how to extend it with your application logic, building custom functionality and features as needed.
Once the script is live, the bunny.net dashboard shows how it is doing. You can see the number of requests it has served in real time, along with your production deployment: timestamps, version history, and deployment status. Execution logs are there too, which is where you go when something is failing or slower than you expected. Settings, script updates, and redeployment all happen from the same place.
 ## Using an existing repository
Use this option when you already have a JavaScript or TypeScript project you want to deploy to Edge Scripting. The repository should be compatible with Edge Scripting, ideally built on Deno or Node.js, and structured so it can integrate with the Edge Scripting deployment GitHub action.
Setup matches the previous section. **Follow the steps in Creating a new repository up to Step 7**, then continue here:
1. Select **Existing Repository**.
2. Choose a repository from the list of your existing GitHub repositories. If the repository is not listed, ensure that the bunny.net GitHub app has the appropriate permissions.
## Using an existing repository
Use this option when you already have a JavaScript or TypeScript project you want to deploy to Edge Scripting. The repository should be compatible with Edge Scripting, ideally built on Deno or Node.js, and structured so it can integrate with the Edge Scripting deployment GitHub action.
Setup matches the previous section. **Follow the steps in Creating a new repository up to Step 7**, then continue here:
1. Select **Existing Repository**.
2. Choose a repository from the list of your existing GitHub repositories. If the repository is not listed, ensure that the bunny.net GitHub app has the appropriate permissions.
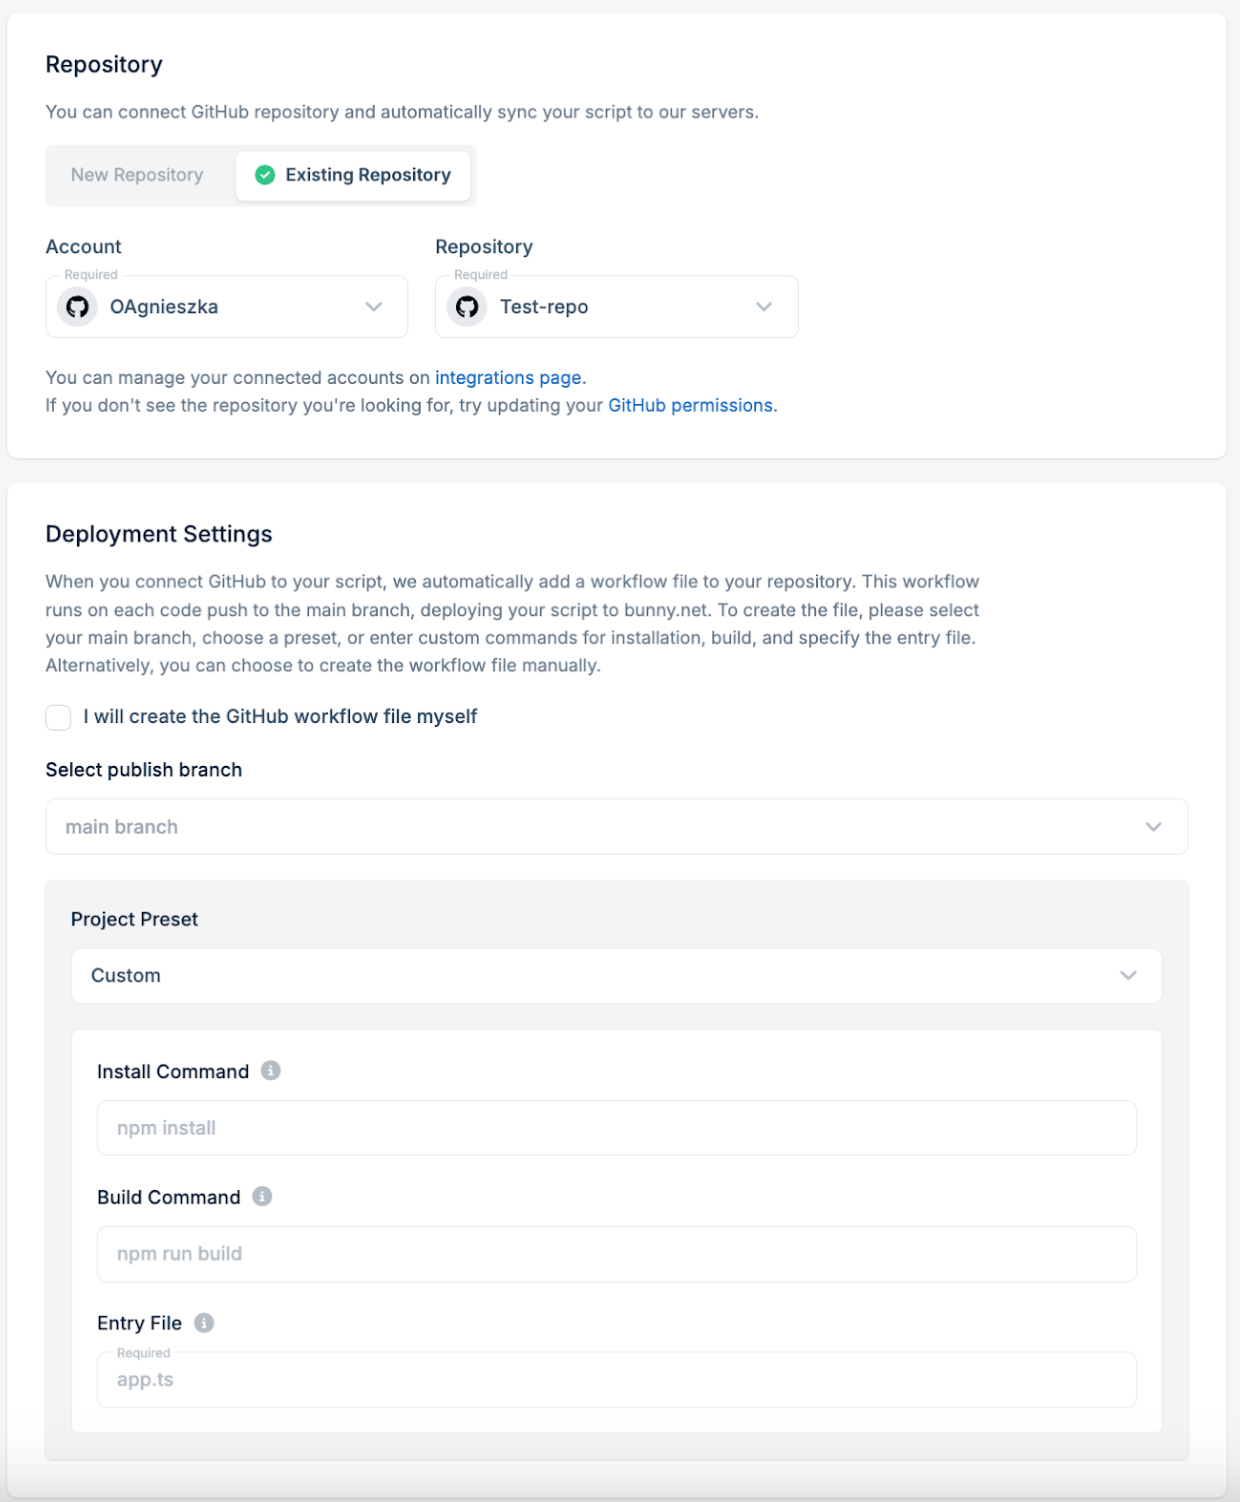 3. Next, select a project preset based on the framework used in your project. If needed, adjust the **install command, build command**, and **entry file parameters**. A deployment workflow file will be automatically created in your existing repository based on these parameters. If you prefer to create the deployment workflow file yourself, select the **I will create the GitHub workflow file myself** option.
4. Your script is now live and ready to be invoked.
The dashboard gives you the same view as it does for a new repository: live request counts, deployment details and version history, execution logs, and the settings and redeploy controls.
3. Next, select a project preset based on the framework used in your project. If needed, adjust the **install command, build command**, and **entry file parameters**. A deployment workflow file will be automatically created in your existing repository based on these parameters. If you prefer to create the deployment workflow file yourself, select the **I will create the GitHub workflow file myself** option.
4. Your script is now live and ready to be invoked.
The dashboard gives you the same view as it does for a new repository: live request counts, deployment details and version history, execution logs, and the settings and redeploy controls.